
Overview #
This guide will show you how to set up an automatic deployment pipeline using GitHub Actions. This pipeline will connect to a target server via SSH, update the Docker image, and restart the Docker containers. Automatic deployment ensures that your applications are always running the latest code with minimal manual intervention.
Prerequisites #
Before you begin, ensure you have the following:
- Docker installed on the target server.
- Docker Compose installed on the target server.
- A GitHub repository set up with your Docker Compose files.
- Access to the target server with appropriate permissions.
Step 1: Create an SSH key #
To allow the GitHub Action runner to connect to your server, you need to create an SSH key pair.
Generate SSH Key Pair #
Run the following command to generate an SSH key pair:
ssh-keygen -t ed25519 -f github_action_runner
The output will look like this:
ssh-keygen -t ed25519 -f github_action_runner                                                                                                                                       ──(Tue,Jul23)─┘
Generating public/private ed25519 key pair.
Enter passphrase (empty for no passphrase):
Enter same passphrase again:
Your identification has been saved in github_action_runner
Your public key has been saved in github_action_runner.pub
The key fingerprint is:
SHA256:1m2zuFb9MLPT7FaApQeRNtpmvtmrPm2tGiafmmvEZj0 [email protected]
The key's randomart image is:
+--[ED25519 256]--+
|            .o   |
|            = .  |
|           + *   |
|         ...* o  |
|        S..=+o . |
|       .  =oEo= .|
|         +o.+* X.|
|          o*+o* *|
|         o=+*=o*.|
+----[SHA256]-----+
Step 2: Add SSH Public Key to Target Server #
Copy the generated public key to the remote server. Replace user and remote_server with your actual username and server address.
ssh-copy-id -i github_action_runner.pub user@remote_server
This command adds the key to the authorized_keys file on the remote server.
Step 3: Create GitHub secret from SSH private key #
Copy the Private Key #
Depending on your operating system, use one of the following commands to copy the contents of the private key to your clipboard.
On macOS #
cat ./github_action_runner | pbcopy
On Linux with xclip
#
cat ./github_action_runner | xclip -selection clipboard
On Linux with xsel
#
cat ./github_action_runner | xsel --clipboard --input
On Windows with PowerShell #
Get-Content -Path "./github_action_runner" | Set-Clipboard
Create the GitHub Secret #
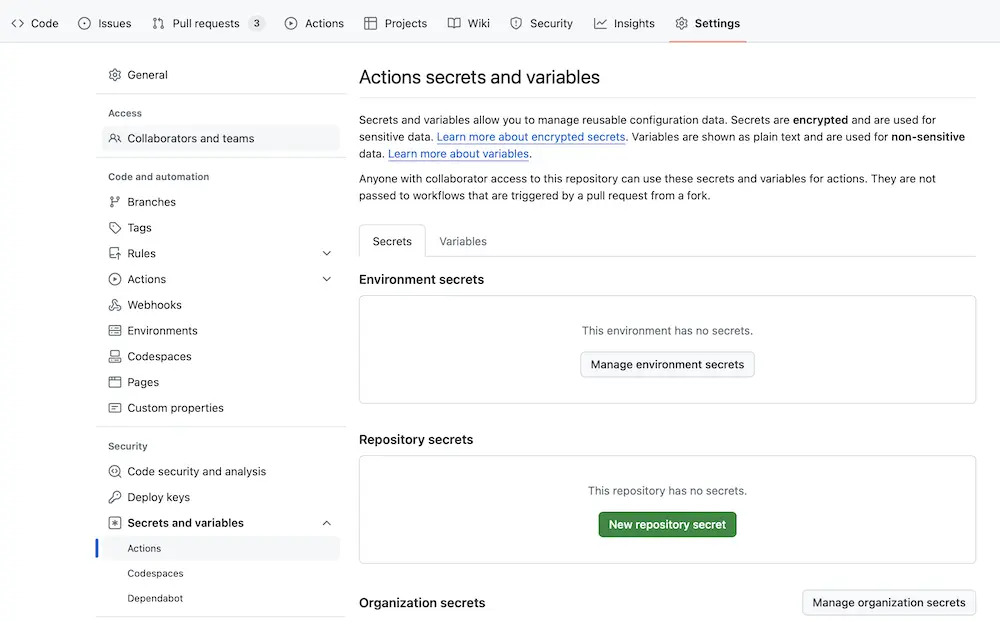
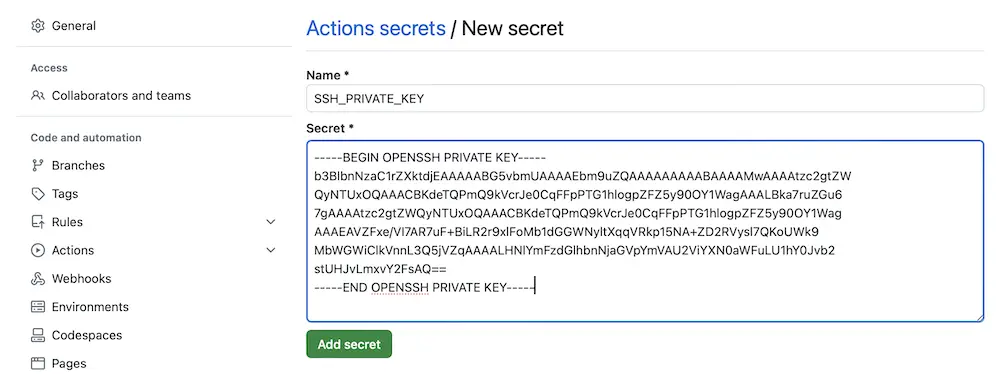
Create a new repository or organization secret named SSH_PRIVATE_KEY and paste the private key’s contents as the secret.
GitHub Repository Settings:
GitHub Repository Adding a Secret:
GitHub Repository Secret added:

Security Note: Ensure that your private key is kept secure and only shared with trusted services.
Step 4: Adjust Docker Compose Configuration #
To simplify auto deployment, extract the Docker image tag from the docker-compose.yml file into a .env file. Replace the image tag with DOCKER_TAG.
Example docker-compose.yml
#
Replace replace-me-org/replace-me-image-name with your actual image path.
services:
  api:
    image: ghcr.io/replace-me-org/replace-me-image-name:${DOCKER_TAG}  # Replace with your image path
    restart: unless-stopped
    env_file:
      - .env
Create or Update .env File
#
Create or extend the .env file with the DOCKER_TAG and set it to the tag you previously had in the docker-compose.yml.
DOCKER_TAG=42424242
Important: Ensure the server has permission to pull images from the GitHub image repository.
Step 5: Adjust Deployment Workflow #
Create or adjust a GitHub Action workflow to auto deploy your latest image.
name: Docker Image CI

on:
  push:
    branches: [ "main" ]

jobs:
  build-push-image:

    runs-on: ubuntu-latest

    outputs:
      date: ${{ steps.date.outputs.date }}

    steps:
      - uses: actions/checkout@v4
      - name: Get current date # get the date of the build
        id: date
        run: echo "::set-output name=date::$(date +%s)"
      - name: Build the Docker image
        run: docker build . --file Dockerfile  --tag ghcr.io/replace-me-org/replace-me-image-name:${{ steps.date.outputs.date }}
      - name: Login to GitHub Container Registry
        uses: docker/login-action@v2
        with:
          registry: ghcr.io
          username: ${{ github.actor }}
          password: ${{ secrets.GITHUB_TOKEN }}
      - name: Push the Docker image to the GitHub registry
        run: docker push ghcr.io/replace-me-org/replace-me-image-name:${{ steps.date.outputs.date }}

  deploy:
    runs-on: ubuntu-latest
    needs: build-push-image

    steps:
      - name: Set up SSH
        uses: webfactory/[email protected]
        with:
          ssh-private-key: ${{ secrets.SSH_PRIVATE_KEY }}

      - name: Add remote server to known_hosts
        run: |
                    ssh-keyscan user@remote_server >> ~/.ssh/known_hosts    # Replace user@remote_server

      - name: Deploy to server
        run: |
          ssh user@remote_server << 'EOF'                         # Replace user@remote_server
            cd <REPLACE_ME_WITH_DOCKER_COMPOSE_FOLDER>            # Replace with your Docker Compose folder
            sed -i 's/^DOCKER_TAG=.*/DOCKER_TAG=${{ needs.build-push-image.outputs.date }}/' .env
            docker compose up -d
          EOF
Visualizing the Deployment Process #
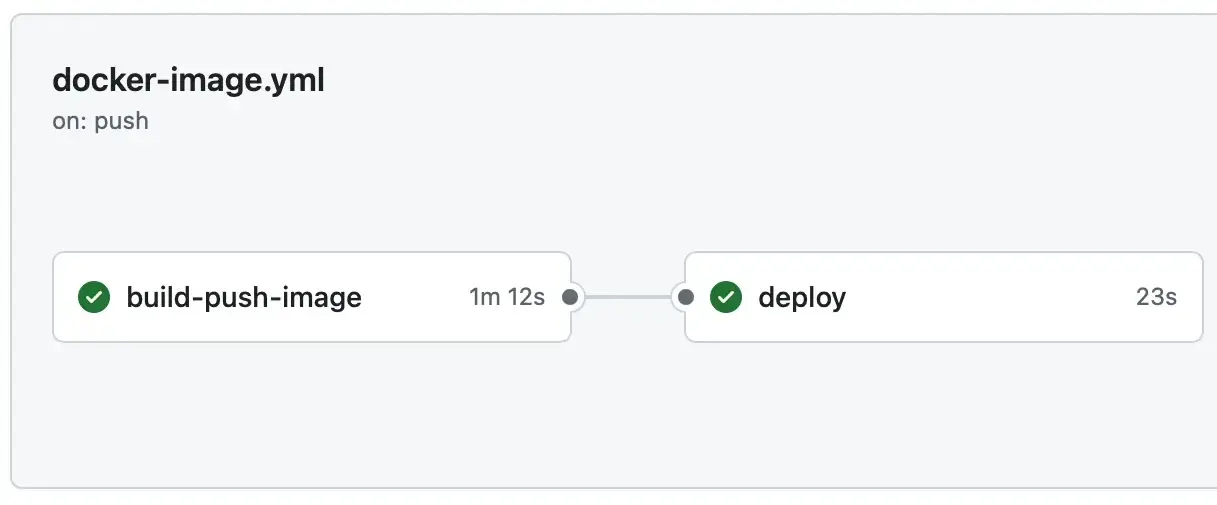
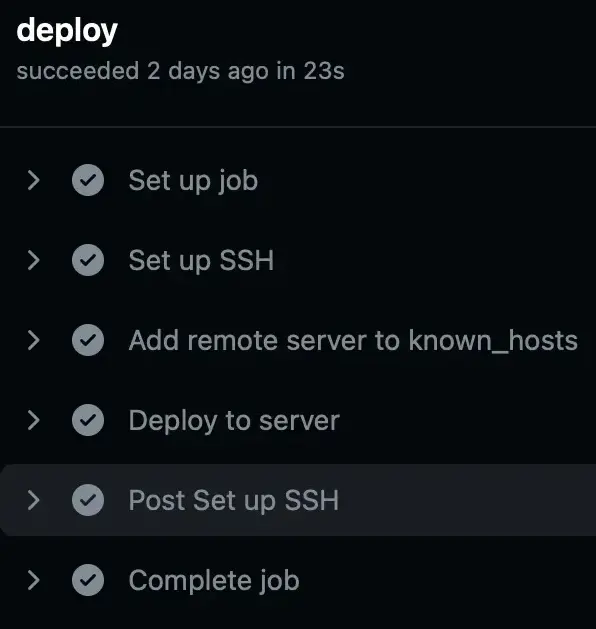
The following images provide a visual representation of the deployment process:
GitHub Action Run Overview:
GitHub Action Deploy Log:
Conclusion #
By following these steps, you can set up a continuous deployment pipeline using GitHub Actions and Docker Compose. This setup ensures that your applications are automatically updated and deployed, reducing manual intervention and improving efficiency.
Further Reading #
For more detailed information on the tools and services used in this guide, check out the following documentation: